
Clip Studio Paint Grid Let s dive deeper into clip studio paint with our favorite csp master
To hide or show the ruler bar, select View > Ruler bar. By default, 0 starts at the top left of the canvas, and the ruler unit is mm. You can change the start position using View > Grid/Ruler Bar Settings. You can also adjust the canvas ruler using the Move layer > Move grid sub tool.
How To Make A Grid In Clip Studio Paint Easily! Don
This material can be used in Studio Mode. ( What is Studio Mode? ) Translated by. This is a grid for drawing guides. (2m square/10cm mesh) Since it is a wire frame mesh, it is possible to check the size etc. in a transparent state even if the character stands behind. Each grid has a separate object and can be moved independently. This is a grid.
Manga Studio 5 / Clip Studio Paint Grid and Ruler YouTube
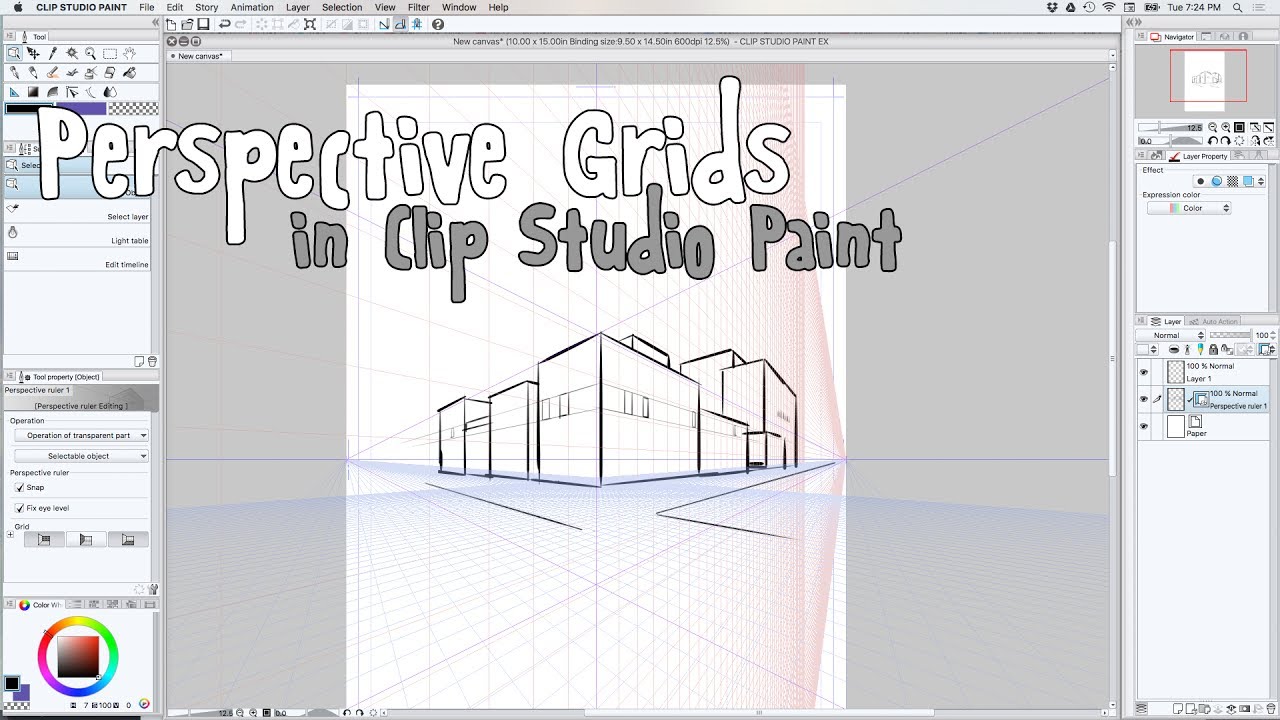
Here are the basics with using the perspective tool in Clip Studio Paint. Sign up for my mailing list! http://www.gunship-thunderpunch.comTip Jar: https://ww.
How to use the PERSPECTIVE RULER/GRID in CLIP STUDIO PAINT (EX/PRO) YouTube
How to make a grid in Clip Studio Paint? Go to 'View -> Grid'. A grid should appear right away on your canvas. This is the short answer on how to open up a grid. You can actually customize this grid as you like and need. Also, I mentioned you can find an easy solution to have isometric grids on Clip Studio, so keep reading!

Clip Studio Paint Perspective Grid You can have as many point
In this tutorial I show you how to make an isometric grid you can use over and over in clip studio paint.My short film https://youtu.be/dc6nYdPeAsEMy social.
How to create a beautiful Pixel Art environment in Clip Studio Paint Graphic Design Tips
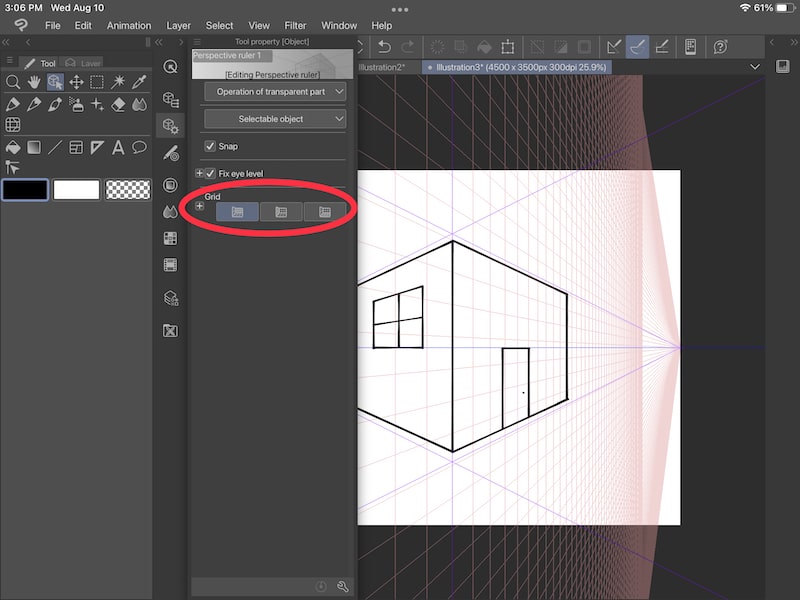
1. Select the Operation tool > Object sub tool. 2. Select the Perspective ruler. 3. Under [Grid] in the Tool Property palette, click the icon to display the grid in the direction you want it to display. Note You can also change the size of the squares using the grid size setting. Was this helpful? Couldn't find an answer to your problem?
How To Make A Grid In Clip Studio Paint Whereintop
Use Clip Studio Paint's 3D object system to quickly place a cube, set a camera angle, and extract a perspective grid.http://www.reubenlara.comInstagram: @reu.
How To Make A Grid In Clip Studio Paint Get up and running with clip studio paint
A: Click the wrench icon on the "Tool Property" panel to open the sub tool details. then click Preferences > Rendering Settings. In this rendering settings menu; Uncheck "Set automatically when resetting camera" and set the "Near Plane" value to 1. then "Apply to all models". ----------------------------------------------

Clip Studio Grid Transform The transform property applies a 2d or 3d transformation to an element
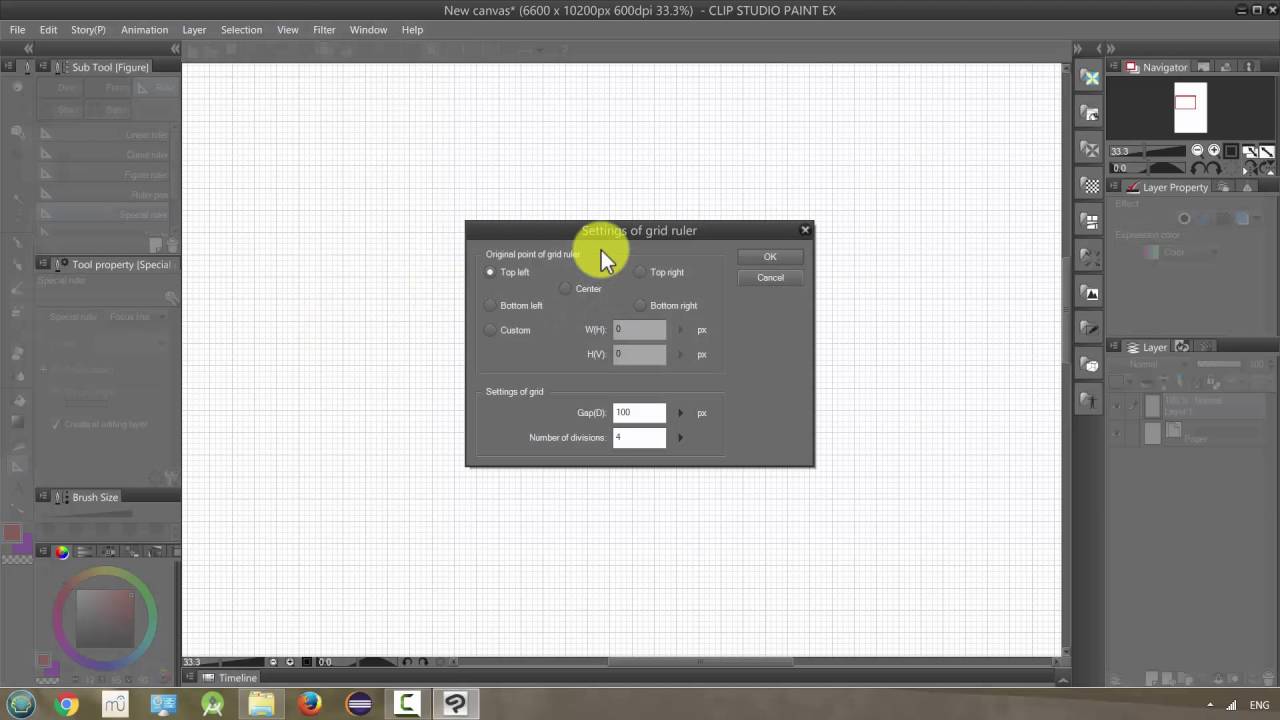
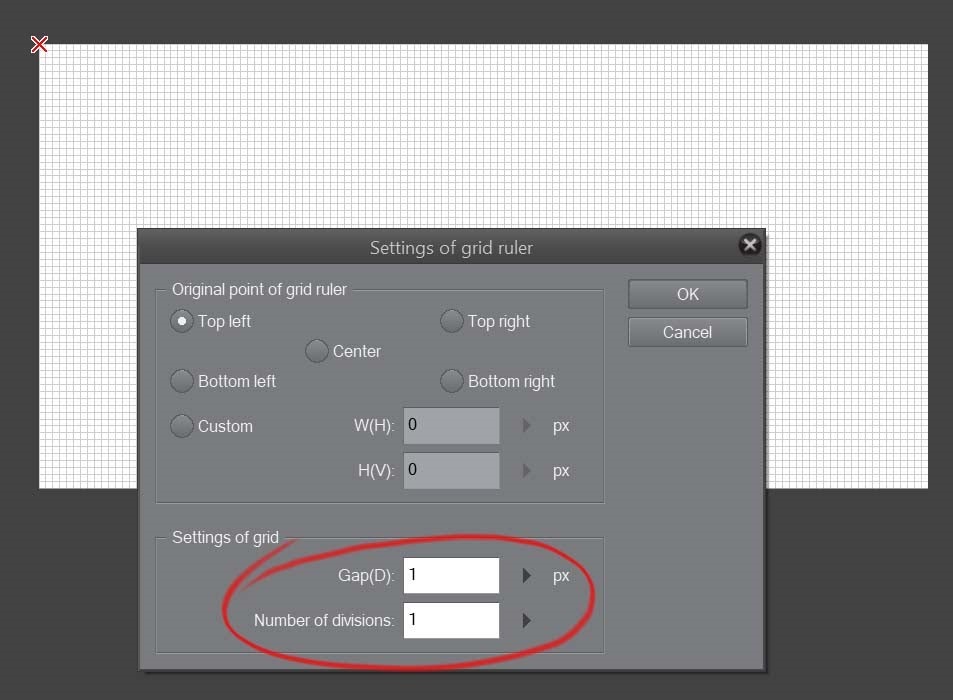
How to Make a Grid in Clip Studio Paint. Go to "view" and select "Grid.". The color and the opacity can be adjusted in the "preferences" dialogue box. Select "ruler/unit" and change the color and thickness accordingly. You can also adjust the grid lines' origin, spacing, and divisions by selecting "Grid/ruler settings" in.

Clip Studio Paint Grid Clip studio paint is a software application for microsoft windows and
To enable or disable snapping, tap the snap toggle icon near the eye level handle. Display and snap to perspective ruler grid The perspective ruler can display an equally spaced grid from the vanishing point. This is useful for drawing evenly spaced lines on floors or windows. Showing the grid
How To Make Perspective Grid In Clip Studio Paint Whereintop
CLIP STUDIO PAINT Instruction manual - Displaying and Snapping to Grid Home > Explanation: Perspective ruler [PRO/EX] > Drawing by Snapping to a Perspective Ruler > Snapping to a Perspective Ruler > Displaying and Snapping to Grid Displaying and Snapping to Grid
Perspective Grid CLIP STUDIO ASSETS
Hi there bunnies,Here is a quick tutorial on how to create your own grid template in CLIP Studio Paint for PEBI (or other grid using programs)What is PEBI?A.
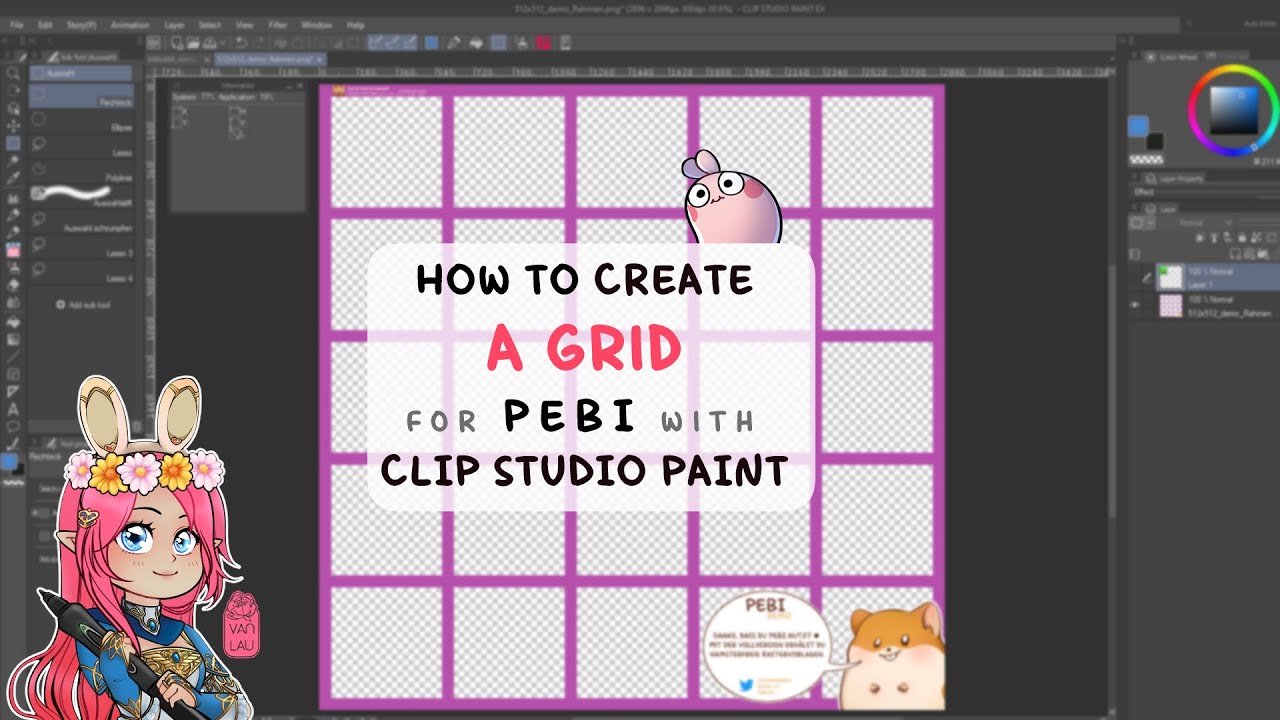
How to create a grid with clip studio ★ Create an emote grid for PEBI YouTube
Here's what you need to do: 1. Open your "Layer" menu, choose the "Ruler/Frame" option, and click the "Create Perspective Ruler" button. To begin with you'll want to dive into your "Layer" menu. Within there, find the "Ruler/Frame" option. Find the button that says "Create Perspective Ruler" and click on it. 2.
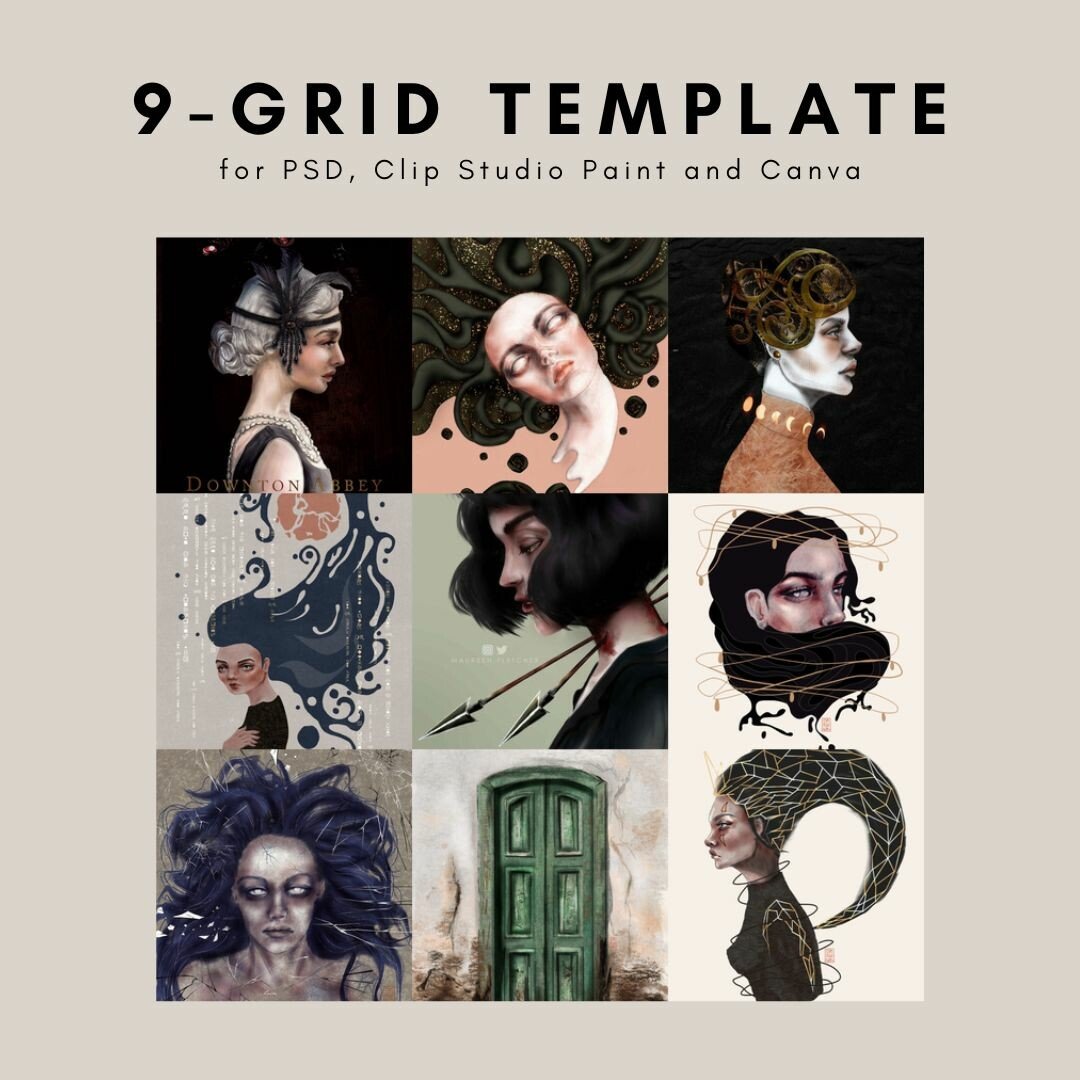
ArtStation 9 Grid Template ( PSD, Clip Studio and Canva compatible ) Artworks
Create dynamic scenes with the fisheye perspective ruler -Ver.2.0- "New features of Clip Studio Paint #6" by ClipStudioOfficial - From Clip Studio Paint Ver. 2.0 onwards, you can use [Fisheye perspective] in [Perspective ruler] w.
How To Make Perspective Grid In Clip Studio Paint Whereintop
28. Free. View more. Clip Studio Paint Free Trial. Make illustrations, manga, comics and animation with Clip Studio Paint, the artist's tool for drawing and painting. All you need for drawing and creating digital art!

Clip Studio Paint Grid Let s dive deeper into clip studio paint with our favorite csp master
[Grid/Ruler Settings] Dialog Box · The unit for setting grids and rulers is the [Unit] that was set when creating the canvas. · If you change the unit using [Change Image Resolution] or [Change Canvas Size] in the [Edit] menu, the unit for configuring grids and rulers will also change.